Showing posts with label Computer Tips and TrickS. Show all posts

Monday, April 2, 2012

how to backup your computer


how to backup your computer

Having your computer backup at all times is golden.
Think about it, it’s not your hard disk price that should worry you, it’s all the data you have stored that can be lost. Documents, photos, mp3′s, software, bookmarks, stored logins, chat history etc… The list is endless.
I had my hard disk burned down, twice!, and it’s not pleasant feeling, not at all.
Too bad I had to burn my data twice, before I decide to have computer data backed up at all times.
I’ve done some research and from all the comments and reviews of data backup services I could find online, Mozy looks like one of the best
They have free / paid versions, pick one depending on your needs.
The link – click here
Get that data on a safe place, please!

Don't forget to live a comment

How to enable scripting in your browser


How to enable scripting in your browser


This Web site uses scripting to enhance your browsing experience.
To allow all Web sites in the Internet zone to run scripts, use the steps that apply to your browser:
Windows Internet Explorer
(all versions except Pocket Internet Explorer)
Note To allow scripting on this Web site only, and to leave scripting disabled in the Internet zone, add this Web site to the Trusted sites zone.
  1. On the Tools menu, click Internet Options, and then click the Security tab.
  2. Click the Internet zone.
  3. If you do not have to customize your Internet security settings, click Default Level. Then do step 4
  4. If you have to customize your Internet security settings, follow these steps:
    a. Click Custom Level.
    b. In the Security Settings – Internet Zone dialog box, click Enable for Active Scripting in the Scripting section.
  5. Click the Back button to return to the previous page, and then click the Refresh button to run scripts.
Mozilla Corporation’s Firefox version 2
  1. On the Tools menu, click Options.
  2. On the Content tab, click to select the Enable JavaScript check box.
  3. Click the Go back one page button to return to the previous page, and then click the Reload current page button to run scripts.
Opera Software’s Opera version 9
  1. On the Tools menu, click Preferences.
  2. On the Advanced tab, click Content.
  3. Click to select the Enable JavaScript check box, and then click OK.
  4. Click the Back button to return to the previous page, and then click the Reload button to run scripts.
Netscape browsers
  1. Select EditPreferences,Advanced
  2. Click to select Enable JavaScript option.

Tuesday, October 11, 2011

how to Rename a Series of Files

Rename a Series of Files

When you download photos from your digital camera, they often have unrecognizable names. You can rename several similar files at once with the following procedure. This also works for renaming other types of files.

1.Open the My Pictures folder. (Click Start, and then click My Pictures.) Or open another folder containing files that you want to rename.
2.Select the files you want to rename. If the files you want are not adjacent in the file list, press and hold CTRL, and then click each item to select it.
3.On the File menu, click Rename.
4.Type the new name, and then press ENTER.


All of the files in the series will be named in sequence using the new name you type. For example, if you type Birthday, the first will be named Birthday and subsequent files in the series will be named Birthday (1), Birthday (2), and so on. To specify the starting number for the series, type the starting number in parentheses after the new file name. The files in the series will be numbered in sequence starting with the number you type. For example, if you type Birthday (10), the other files will be named Birthday (11), Birthday (12), and so on

How to Rename the Recycle Bin

How to Rename the Recycle Bin

To change the name of the Recycle Bin desktop icon, open Regedit and go to:

HKEY_CLASSES_ROOT/CLSID/{645FF040-5081-101B-9F08-00AA002F954E}

and change the name "Recycle Bin" to whatever you want (don't type any quotes).


how to Remove Recycle Bin from the Desktop

Remove Recycle Bin from the Desktop

If you don't use the Recycle Bin to store deleted files , you can get rid of its desktop icon all together.

Run Regedit and go to:


HKEY_LOCAL_MACHINE/SOFTWARE/Microsoft/Windows/CurrentVersion/explorer/Desktop/NameSpace


Click on the "Recycle Bin" string in the right hand pane. Hit Del, click OK.


How To Enable Hibernation

How To Enable Hibernation

Under Windows 98, Me, or 2000 there was an option in the shutdown dialog box to enter the computer into hibernation (where all the content of the RAM is copied to the hard disk). The shutdown dialog box of Windows XP doesn't offer any longer the hibernation button. Some users may get confused about how to enable the hibernation mode. If this mode is supported by your motherboard (ACPI) you have to do the following:

Click Start and Shut Down,

Point the standby button and maintain the shift key pushed,

A new hibernation button appears: click it while still holding the shift key: voila your PC will hibernate.

How to Convert FAT to NTFS file system

How to Convert FAT to NTFS file system

To convert a FAT partition to NTFS, perform the following steps.

Click Start, click Programs, and then click Command Prompt.

In Windows XP, click Start, click Run, type cmd and then click OK.

At the command prompt, type CONVERT [driveletter]: /FS:NTFS.

Convert.exe will attempt to convert the partition to NTFS.

NOTE: Although the chance of corruption or data loss during the conversion from FAT to NTFS is minimal, it is best to perform a full backup of the data on the drive that it is to be converted prior to executing the convert command. It is also recommended to verify the integrity of the backup before proceeding, as well as to run RDISK and update the emergency repair disk (ERD).

how to enable cd Autorun


how to enable cd Autorun

( WinXP PRO Only)


1) Click Start, Run and enter GPEDIT.MSC

2) Go to Computer Configuration, Administrative Templates, System.

3) Locate the entry for Turn autoplay off and modify it as you desire.


Monday, September 5, 2011

Hidden Star Wars in Windows XP

Watch Hidden Star Wars in Windows XP,also try in Win7


There is a complete copy of Star Wars done entirely in ASCII characters in the Windows operating system. The only thing required to watch it is an internet connection; speed does not matter.


A Picture showing Star Wars in command prompt

To watch it on Windows XP,
  1. Go to Start, Run.
  2. Now type "telnet towel.blinkenlights.nl" without the quotes and press Enter.

On Windows 7 and Windows Vista

Telenet is turned off by default in latest versions of Windows. So, in order to watch star wars, you must first enable telnet by going to Control Panel › Programs › Turn Windows Feature On or Off and then tick both telnet check boxes. After doing that, follow the steps given below:-
  1. Go to Start, Search.
  2. Type telnet and press Enter.
  3. In the following command prompt window, type "o" without quotes and press enter.
  4. Now type "towel.blinkenlights.nl" without the quotes and press Enter.
If you do not need telent anymore, you can turn it off.
A command prompt window like one in the image will open with the movie being played in it. See the movie yourself. Did you enjoy watching this new version of Star Wars. Well, I did and know it for sure that you would have too. 

How To Enable Task Manager disabled by Virus

Enable Task Manager disabled by Administrator or Virus in Windows 

 In such situations, running the Task Manager will give the "Task Manager has been disabled by Administrator" error. However, there are some techniques you can use to re-enable task manager and close those harmful programs manually. This article contains few such simple techniques you can use to regain access to Task Managing privileges.

enable task manager disabled by administrator

Enable Task Manager from Registry in Windows 7, XP or Vista

Registry Editor is an inbuilt Windows tool that is used to modify registry keys which tell Windows how it should work. A simple registry modification can be used to bypass the Task Manager block. To do so, just follow the steps:-
  1. Click on Start. Go to Run. If you use Windows 7 or Windows Vista, go to Search.
  2. Type regedit and press Enter. Registry Editor will start. If Registry Editor is also disabled, you will first need to enable registry editing.
  3. Through the left hand navigation pane, navigate to HKEY_CURRENT_USER\Software\Microsoft\ Windows\ Current Version\Policies\System.
  4. In the work area, double click on "Disable TaskMgr". A window will pop up.
  5. Enter its value data as 0 and press OK.
  6. Close Registry Editor. If Task Manager is still disabled, restart your computer.

Enable Task Manager from Group Policy Editor (Gpedit.msc)

enable task manager
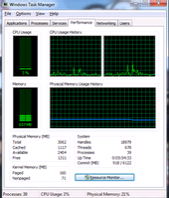
Windows Task Manager in Windows 7
Group Policy Editor is a feature in Windows which is used to edit local policy settings. It can also be used to enable Task Manager. To do so, just follow the steps given below:-
  1. Open Star Menu. Windows XP users click on Run. Windows 7 and Vista users, click on Search.
  2. Type gpedit.msc and press Enter. Group Policy Editor Window will show up.
  3. From the navigational pane at the left hand side, go to: User Configuration>Administrative Templates>System>Ctrl+Alt+Del Options.
  4. In the work area, double click on "Remove Task Manager" and set its value to Disabled or Not Configured.
  5. Restart your Computer or Log Off and Log back On to apply the changes.

Enable Task Manager by Running a CMD Command

Command Prompt can also be used to directly enable Task Manager.
  1. Just open Run command by pressing Window Key+R or through clicking on Start Menu and opening Run.
  2. Copy the code given below and paste it in the text form of the Run Command.
  3. REG add HKCU\Software\Microsoft\Windows\CurrentVersion\Policies\System  /v  DisableTaskMgr  /t REG_DWORD  /d /0 /f
  4. Press Enter. A command prompt window will flash for a second and then disappear indicating successful execution. After running the command, you will be able to again use Task Manager. If Task Manager is still not available, restart your computer.

Create a Registry(.reg) file for enabling Task Manager

If you are unfamiliar with manually editing the Registry, you can create a Registry file which will automatically modify the Registry Key to re-enable Task Managing. To create one such file:-
  1. Open Notepad or any other text editor.
  2. Copy the code given below and paste it as it is in it.
  3. Windows Registry Editor Version 5.00 [HKEY_CURRENT_USER\Software\Microsoft\Windows\ CurrentVersion\Policies\System] “DisableTaskMgr”  =dword:00000000
  4. Save the file as Enable Task Manager.reg or *.reg.
  5. Open the file by double clicking on it.
  6. Registry Editor will ask you for confirmation. In the confirmation Window, click Yes.
  7. Task Manager would immediately be accessible. If it is not, restart your computer.

Sunday, September 4, 2011

HOW TO CHANGE HARD DRIVE ICON


Tuesday, August 30, 2011

Why Is Jusched.exe It Running?

What is jusched.exe And Why Is It Running?

If you’ve looked in Task Manager and wondered what on earth the jusched.exe process is and if you can turn it off, then you are in luck. This process is the Java Update scheduler, which is a process that wastes memory all the time just to check once a month whether there are new updates to Java.
There’s a scheduled tasks feature built into Windows for this type of thing… the java update scheduler is obviously not being used for critical updates since it’s only scheduled to check once each month. Since I simply can’t understand why the process needs to waste my memory, it has to go.
image
What you’ll need to do is open up Control Panel, and then if you are in XP you can click on the Java icon, or in Vista you can click on Additional Options, and then click on Java.
Once you have the Java Control Panel open, select the Update tab, and then uncheck the box for “Check for Updates Automatically”
image
You’ll receive a warning message stating that if somebody finds a security hole in Java that it will take up to a month before you are protected from it:


image


Schedule Java Update Check (Optional)
Just type in Task Scheduler into the start menu search box to open the task scheduler, and then click on Create Basic Task.
image
Follow the wizard along to pick a month and date, and then when you get to the “Start a Program” screen, use this as the path, adjusting if you are running a different version of Java. The key thing is that you run the jucheck.exe in your Java directory.
“C:\Program Files\Java\jre1.6.0_01\bin\jucheck.exe”
image
Now when the scheduled task runs once a month, or whenever you schedule it, you’ll get this dialog if there is a new version, or another dialog stating there are no updates to Java.
image
It’s actually somewhat ironic that there’s an update to Java.

Windows Explorer Right Click Menu Get Add Copy To / Move To

Add Copy To / Move To to the Windows Explorer Right Click Menu---

 Here’s the quick registry hack to get this working. As usual, back up your registry just in case. You will want to browse down to this key.

Method --

HKEY_CLASSES_ROOT\AllFilesystemObjects\shellex\ContextMenuHandlers 

 Now you will double-click on the (Default) value and enter the following:

{C2FBB630-2971-11D1-A18C-00C04FD75D13}

If you want to enable Move To, you will repeat the same steps, except creating a new key named Move To, and using this value:
{C2FBB631-2971-11D1-A18C-00C04FD75D13}
Now when you right click on a file or folder, you should see the following options:

Let’s click Copy To Folder just to see what happens….

 I think this is use full for U......Enjoy

Get Add Control Panel to My Computer Right Click

 My Computer Right Click And Then Get Control Panel:--


[HKEY_CLASSES_ROOT\CLSID\{20D04FE0-3AEA-1069-A2D8-08002B30309D}\shell]
@="none"

[HKEY_CLASSES_ROOT\CLSID\{20D04FE0-3AEA-1069-A2D8-08002B30309D}\shell\ControlPanel]
@=hex(2):40,00,25,00,53,00,79,00,73,00,74,00,65,00,6d,00,52,00,6f,00,6f,00,74,\
  00,25,00,5c,00,73,00,79,00,73,00,74,00,65,00,6d,00,33,00,32,00,5c,00,73,00,\
  68,00,65,00,6c,00,6c,00,33,00,32,00,2e,00,64,00,6c,00,6c,00,2c,00,2d,00,33,\
  00,30,00,34,00,38,00,38,00,00,00
"Icon"=hex(2):63,00,6f,00,6e,00,74,00,72,00,6f,00,6c,00,2e,00,65,00,78,00,65,\
  00,00,00

[HKEY_CLASSES_ROOT\CLSID\{20D04FE0-3AEA-1069-A2D8-08002B30309D}\shell\ControlPanel\command]
@="rundll32.exe shell32.dll,Control_RunDLL"
 
Sea Effact....... 

Monday, August 29, 2011

How To Lock Folder Without Any Software :

Lock Folder Without Any Software :--

Paste the code given below in notepad and 'Save' it as batch file (with extension '.bat').
Any name will do.
Then you see a batch file. Double click on this batch file to create a folder locker.
New folder named 'Locker' would be formed at the same location.
Now bring all the files you want to hide in the 'Locker' folder. Double click on the batch file to lock the folder namely 'Locker'.


If you want to unlock your files,double click the batch file again and you would be prompted for password.
Enter the password and enjoy access to the folder.


if EXIST "Control Panel.{21EC2020-3AEA-1069-A2DD-08002B30309D}" goto UNLOCK
if NOT EXIST Locker goto MDLOCKER
:CONFIRM
echo Are you sure u want to Lock the folder(Y/N)
set/p "cho=>"
if %cho%==Y goto LOCK
if %cho%==y goto LOCK
if %cho%==n goto END
if %cho%==N goto END
echo Invalid choice.
goto CONFIRM
:LOCK
ren Locker "Control Panel.{21EC2020-3AEA-1069-A2DD-08002B30309D}"
attrib +h +s "Control Panel.{21EC2020-3AEA-1069-A2DD-08002B30309D}"
echo Folder locked
goto End
:UNLOCK
echo Enter password to Unlock folder
set/p "pass=>"
if NOT %pass%==type your password here goto FAIL
attrib -h -s "Control Panel.{21EC2020-3AEA-1069-A2DD-08002B30309D}"
ren "Control Panel.{21EC2020-3AEA-1069-A2DD-08002B30309D}" Locker
echo Folder Unlocked successfully
goto End
:FAIL
echo Invalid password
goto end
:MDLOCKER
md Locker
echo Locker created successfully
goto End
:End

 Thanks for Visit..............

Popular Posts